

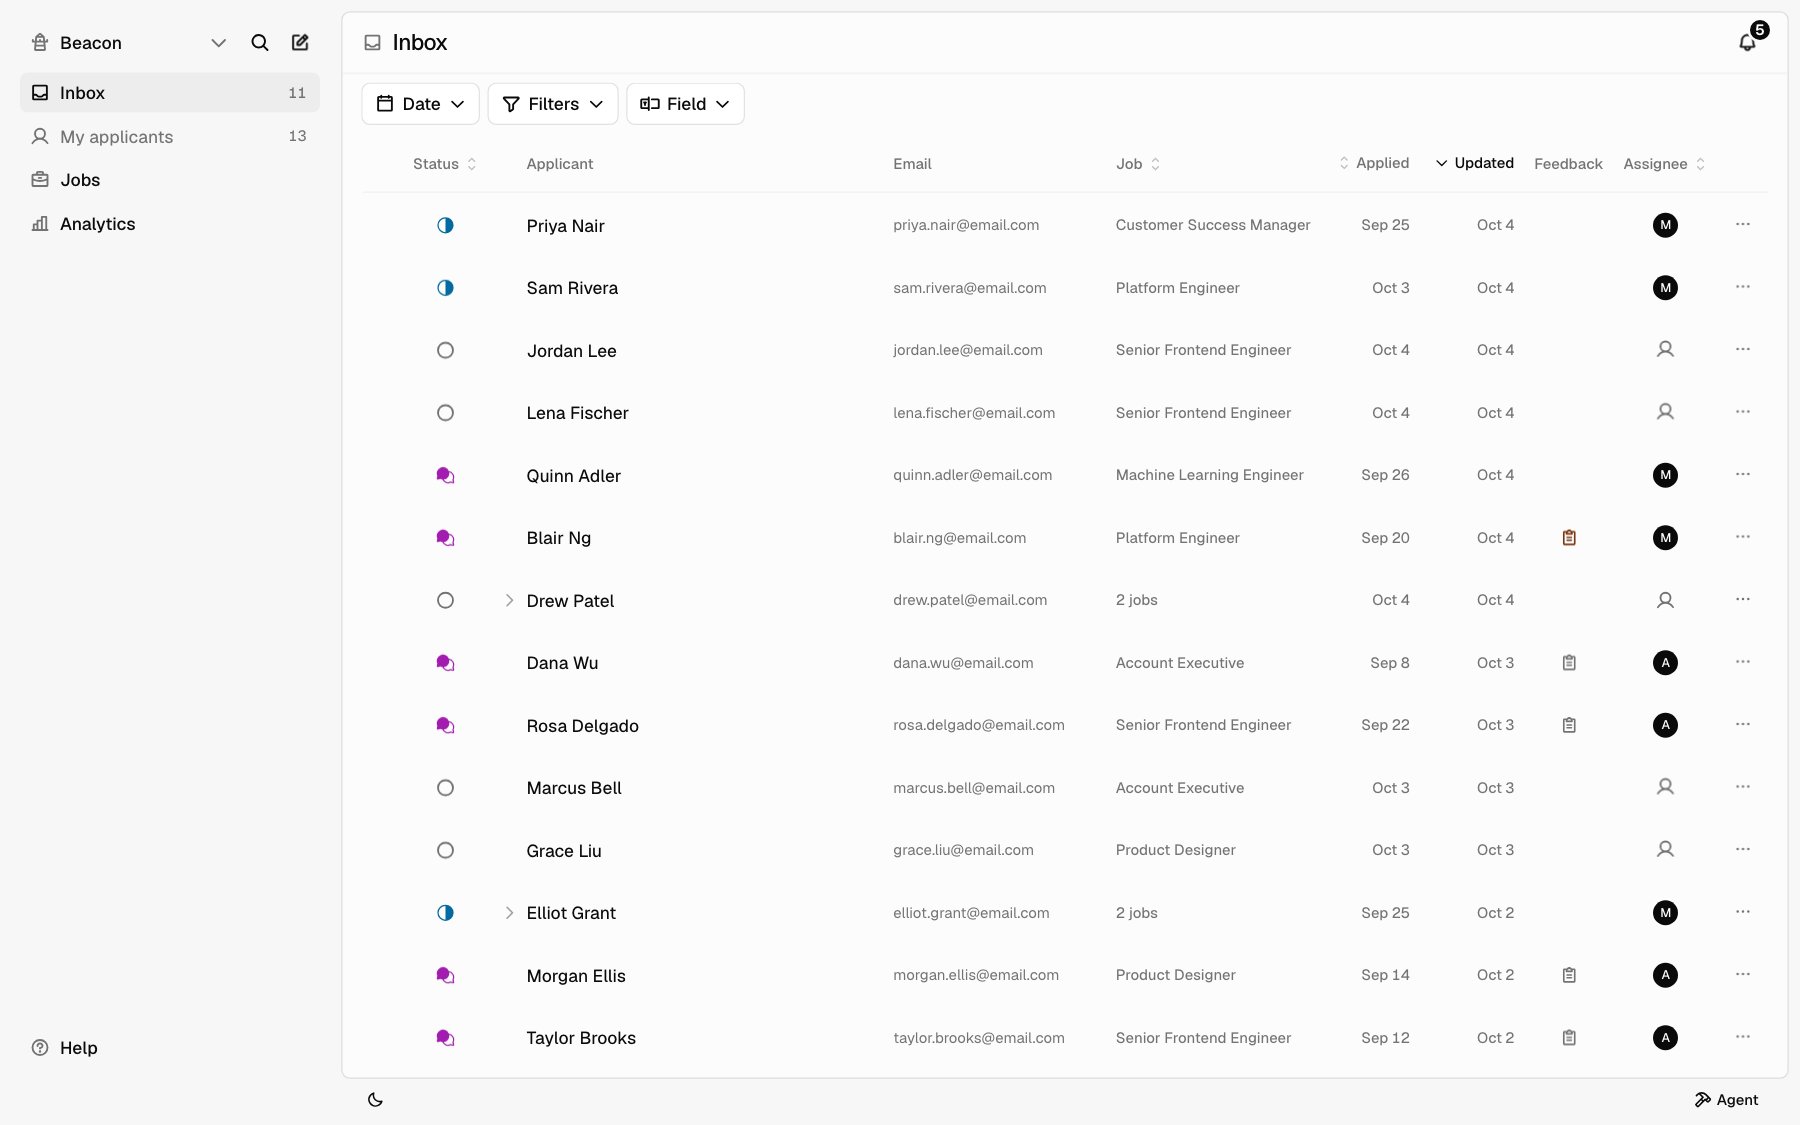
Read the list
Each row is one application.
When someone applied to more than one of your jobs, they get one row that shows how many jobs. Click it to see each application underneath.
The list starts sorted by Updated, newest first. Click Status, Job, Applied, Updated, or Assignee at the top of a column to sort by it. Click again to flip the order.
The list shows 20 applicants per page. Use the controls at the bottom to page through.
Statuses
Every application has one status.
To change a status, click the status icon on the row and pick a new one. You can also change it from the applicant’s record.
Changing a status doesn’t email the applicant by itself. Picking Rejected opens the Reject dialog first, where you choose whether to send a rejection email. See Reject an applicant. An automation you set up can also send email when a status changes.
An applicant who failed a knockout question lands in Rejected. Hover their status to see which knockout they failed.
Filter the list
Use the controls above the list.- Date narrows to applicants who applied in a range: Today, Yesterday, Last 7 days, Last 30 days, This month, Last month, All time, or dates you pick.
- Filters opens a menu with the options below.
- Field filters by a custom field. It shows when your company has custom fields.
Each filter you apply shows as a chip next to the controls. Click the x on a chip to remove that filter.
Filter by a custom field
1
Click Field
Click Field above the list.
2
Pick the field
Choose a field from the list. Your company’s custom fields live under Settings > Fields.
3
Set the comparison and value
Pick a comparison if the field offers more than one: is, contains, at least, or at most. Then type or pick the value. A Multi-select field matches applications that include the option you pick.
4
Add it
Click Add filter. Add more fields to narrow the list further.
Assign an applicant
The assignee is the teammate who owns an application. Click the face in the Assignee column and pick a teammate, or No assignee to clear it. To see only your own, set Filters > Assignee to Mine, or pick a teammate to see theirs.Archive and restore
Archiving hides an application from the default list. Its status stays the same.1
Open the row menu
Click ⋯ at the end of the row.
2
Archive
Click Archive, then Archive again to confirm.
Change many at once
1
Select rows
Check the box at the start of each row. Hold Shift and click a second box to select every row in between. The box at the top of the list selects every row on the page.
2
Pick an action
The bar at the bottom shows how many you selected. Choose an action:
- Status sets one status on all of them. Rejected opens the Reject dialog first.
- Assign sets one assignee, or No assignee.
- Archive archives them after you confirm. When Show is set to Archived, this is Restore instead.
Other row actions
Click ⋯ at the end of a row for:- Add note to write a note for your team. It doesn’t email the applicant.
- Email to open the applicant’s record with a new email ready.
- Copy email to copy their address.
- Archive or Restore.
Saved views
A saved view is a personal bookmark for a set of filters. Your views show in the sidebar under Inbox, each with how many applications it matches.Save a view
1
Set your filters
Pick the filters you want. Save view appears above the list once your
filters differ from the default and don’t match a view you already have.
2
Click Save view
Click Save view.
3
Name it
Type a name. Optionally pick a color and an icon. Search the icons by name.
4
Save
Click Save. The view opens and appears in the sidebar.
Change a view
To change a view’s filters, open it from the sidebar, change the filters, and click Update view. To rename it or change its color or icon, hover the view in the sidebar, click ⋯, and pick Edit. The Edit view dialog changes the name, color, and icon. Filters stay as saved.Open a view by default
Hover the view in the sidebar, click ⋯, and pick Set as default. The Inbox now opens on that view. Pick Remove as default so the Inbox opens on all applications again.Delete a view
Hover the view in the sidebar, click ⋯, and pick Delete. This deletes the view only. No applications change. To hide your views in the sidebar, hover Inbox and click the arrow next to it. Click it again to show them.Related
- Candidate record
- Applications for the same actions over the API and MCP
- Automations