

The automations list
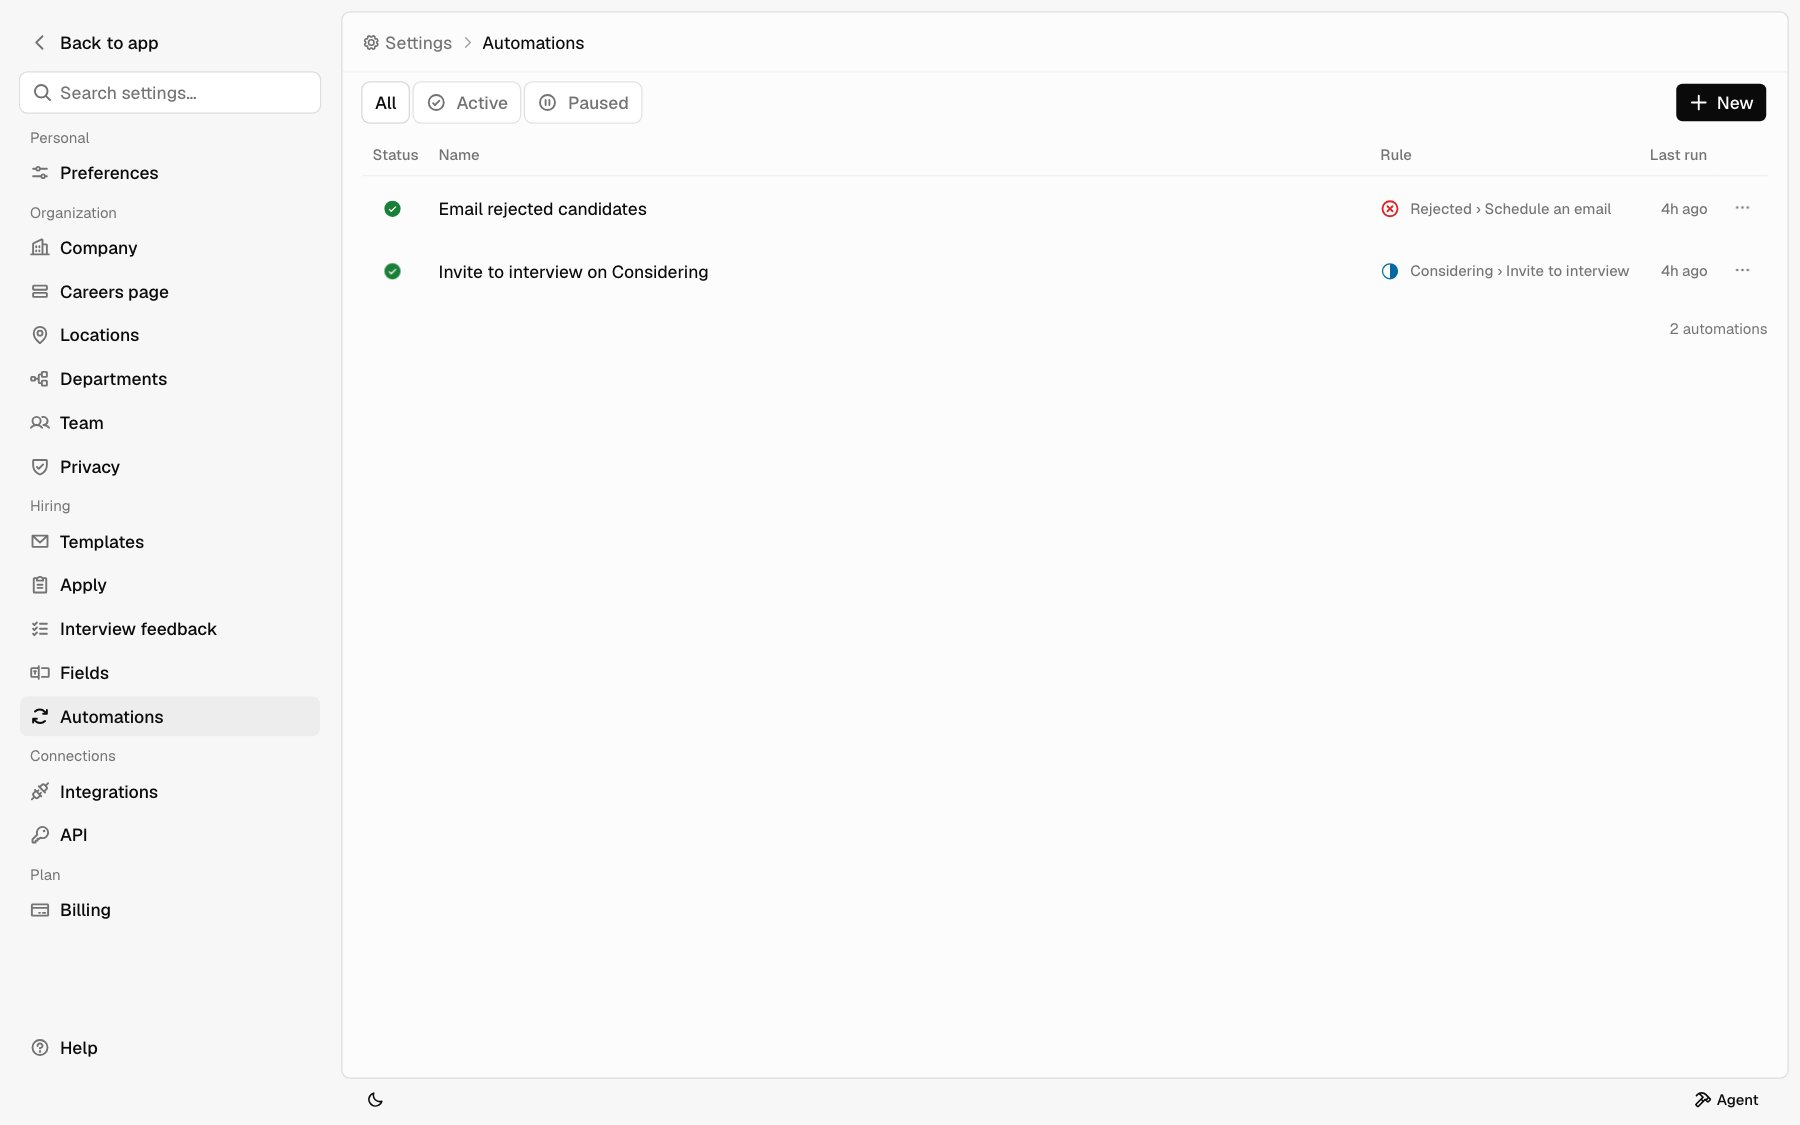
Open Settings > Automations. Each row is one automation.
Use All, Active, and Paused above the list to filter it. Click a row to open the automation.
The ⋯ menu on a row has Open, Pause or Activate, and Delete.
When you have none yet
With no automations, the page offers three ways to start:- New opens a blank automation.
- Ask Agent opens Agent so you can describe the rule and have it drafted.
- Install starter pack adds three ready-made automations. It shows only if your company never installed the pack.
The starter pack
The pack adds three automations. They arrive Paused, so nothing happens until you turn them on.
If you deleted your Interview template, the pack leaves out the second automation.
Create an automation
1
Click New
Under Settings > Automations, click New. You can also search for New automation in Search.
2
Name it
Type a name at the top. If you leave it blank, the automation is named after its rule, like Rejected › Schedule an email.
3
Pick the trigger
Click the value next to When and pick a trigger. See Triggers.
4
Add conditions, if you need them
Click Add step and pick Only if…. Choose a field, how to compare it, and a value. See Conditions.
5
Add actions
Click Add step and pick an action under Then. Add as many as you need. They run in order. See Actions.
6
Create
Click Create. You need at least one action.
Triggers
The trigger is what starts the automation.
The three feedback triggers don’t run while your company has interview feedback turned off, and you can’t pick them for a new automation.
On a schedule
Pick On a schedule, then pick when it runs and the timezone.- When: Weekdays at 8:00 AM, Weekdays at 9:00 AM, Weekdays at 10:00 AM, Every day at 8:00 AM, Every day at 9:00 AM, Mondays at 8:00 AM, Mondays at 9:00 AM (the default), Mondays and Thursdays at 9:00 AM, Fridays at 5:00 PM, or 1st of the month at 9:00 AM.
- Timezone: Eastern Time, Central Time (the default), Mountain Time, Arizona, Pacific Time, Alaska, Hawaii, Toronto, Vancouver, UTC, London, Paris, Tokyo, or Sydney.
Conditions
Conditions narrow which applications the automation acts on. With no conditions, it acts on every application the trigger brings in. Your first condition reads Only if. When you add a second, pick And to require every condition, or Or to require any one. The choice applies to all your conditions.
To compare, pick is, is not, is one of, is not one of, contains, greater than, at least, less than, at most, is empty, is not empty, is true, or is false.
Automations apply to all your jobs. To limit one to a single job, add the condition Job is that job.
Days in status and Days since applied are about 0 when an event
trigger fires. To act after time passes, use On a schedule.
Actions
Actions run in order, top to bottom.
Schedule an email is the only action that emails a candidate without a person clicking Send.
With a feedback trigger, an automation can’t move someone to Rejected or schedule an email. A verdict informs the debrief; a person decides. Verdicts are only readable once the whole panel is in, so a rule can’t tell someone a colleague’s verdict before they’ve added their own. See Interview feedback.
Drafts show at the top of the candidate’s record. See Drafts from automations.
Assign an owner
Assign an owner replaces an owner someone already picked. To keep theirs, add the condition Assignee is empty.Schedule an email
Pick a template and when it sends: next business day, in 2 business days, in 3 business days, or in 5 business days. Business days skip Saturday and Sunday. The email goes out at the same time of day the automation ran. The email sends from the Gmail of the person who created the automation. The step says whose, like Sends from your Gmail. The step is skipped, and the run says why, when:- The automation’s creator hasn’t connected Google Workspace. See Integrations.
- An email is already waiting for the candidate.
If an active automation emails applicants who move to Rejected, the
Reject dialog doesn’t offer a second email. Rejecting is enough. See
Reject an applicant.
Invite to interview
Pick an email template that has the Booking link token. Only those templates show. See Templates. The automation opens a booking link on the calendar of the person who created it: 30 minutes, weekdays 9 AM to 5 PM, over the next 14 days. Then it drafts your template with the link filled in. A person reviews and sends the email. Nothing is booked until the candidate picks a time. See Schedule interviews. The step is skipped, and the run says why, when:- The automation’s creator hasn’t connected Google Workspace.
- The candidate already has an open booking link.
- An email is already waiting for the candidate.
When one automation sets off another
Set status and Add a note can start other automations that use Status changed or Note added. An automation never starts itself.Turn an automation on or off
New automations start Paused. A paused automation doesn’t run. To turn one on, do one of these:- In the list, click the status mark on the row and pick Active.
- In the list, click ⋯ on the row and pick Activate.
- Open the automation and pick Active from the status in the right panel.
- Ask Agent to turn it on. Agent shows a card, and the automation turns on when you click Approve.
Edit an automation
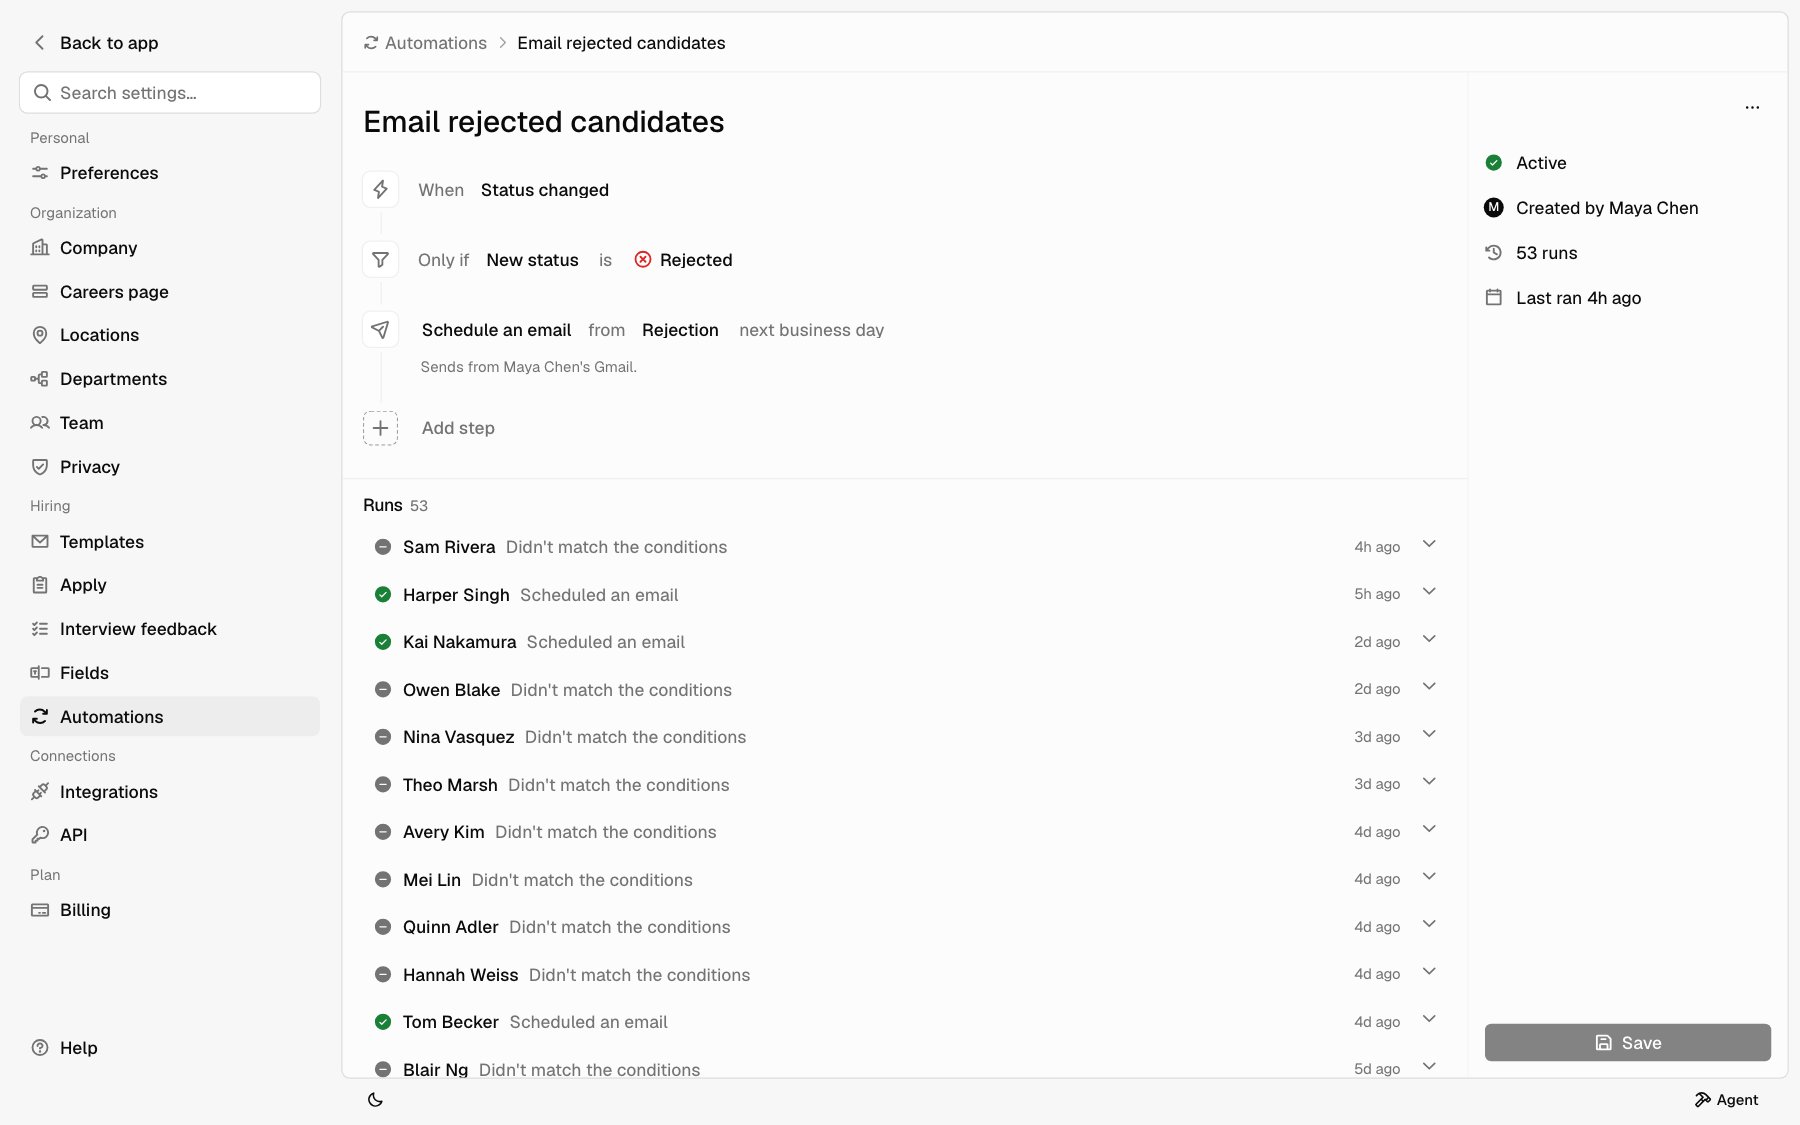
Click the row to open it. Change the name, trigger, conditions, or actions, then click Save. Save stays off until you change something. The right panel shows who created it, how many runs it has, and when it last ran.Delete an automation
1
Open the menu
In the list, click ⋯ on the row. Or open the automation and click ⋯
at the top of the right panel.
2
Delete
Pick Delete, then click Delete to confirm.
Runs
Open an automation and scroll down to Runs. For event triggers, a run is recorded each time the trigger fires, even when the conditions don’t match. A scheduled automation records a run only for the applications it acts on. The newest runs are at the top. Each run shows the candidate’s name and what happened, like Scheduled an email or Moved to Considering. Click the name to open their record.
A run can be Done with an action that was skipped. It reads Skipped and the action, with the reason. For example, the creator hasn’t connected Google Workspace.
Click a run to see more:
- Trigger: what started it.
- Condition: Passed or Didn’t match.
- Actions: what it did.
- Error: why it failed, on a failed run.
- Status: Done, Skipped, or Failed.
Examples
Email rejected candidates the next business day
This is the first automation in the starter pack. To build it yourself:1
Click New
Under Settings > Automations, click New.
2
Set the trigger
Set When to Status changed.
3
Add the condition
Click Add step > Only if…. Set it to New status is Rejected.
4
Add the action
Click Add step > Schedule an email. Pick your Rejection template and next business day.
5
Create and turn it on
Click Create, then set the status to Active.
Invite Considering candidates to interview
This is the second automation in the starter pack. To build it yourself:1
Click New
Under Settings > Automations, click New.
2
Set the trigger
Set When to Status changed.
3
Add the condition
Click Add step > Only if…. Set it to New status is Considering.
4
Add the action
Click Add step > Invite to interview. Pick a template with the Booking link token.
5
Create and turn it on
Click Create, then set the status to Active.
Related
- Candidate record
- Inbox
- Schedule interviews
- Templates
- Integrations
- Getting around
- Webhooks to get hiring events in your own systems