> ## Documentation Index
> Fetch the complete documentation index at: https://docs.hotfix.jobs/llms.txt
> Use this file to discover all available pages before exploring further.
> ## Agent Instructions
> Product noun is jobs.
> MCP at https://rest.hotfix.jobs/mcp is the hiring contract for agents. Clients sign in with Hotfix; API keys are for HTTP only.
> Do not invent unpublished REST or hiring stats. Webhooks are set up in the app; there is no REST route or MCP tool to manage them.
> Do not mention Greenhouse, Ashby, Quick Apply, or claim.
> Creating a draft, offer, or booking link does not send email.
# Set up hiring
> Add your company, pick a plan, connect Google and Zoom, and post your first job.
Setup runs the first time you open the app at `app.hotfix.jobs`. It walks you through four steps: **Your company**, **Plan**, **Connect Google & Zoom**, and **Post a job**. The last two are optional, and you can come back to them in **Settings**.
Setup has the screen to itself until you finish or skip it. The sidebar appears after that. If you need to leave, use **Sign out** at the top right.
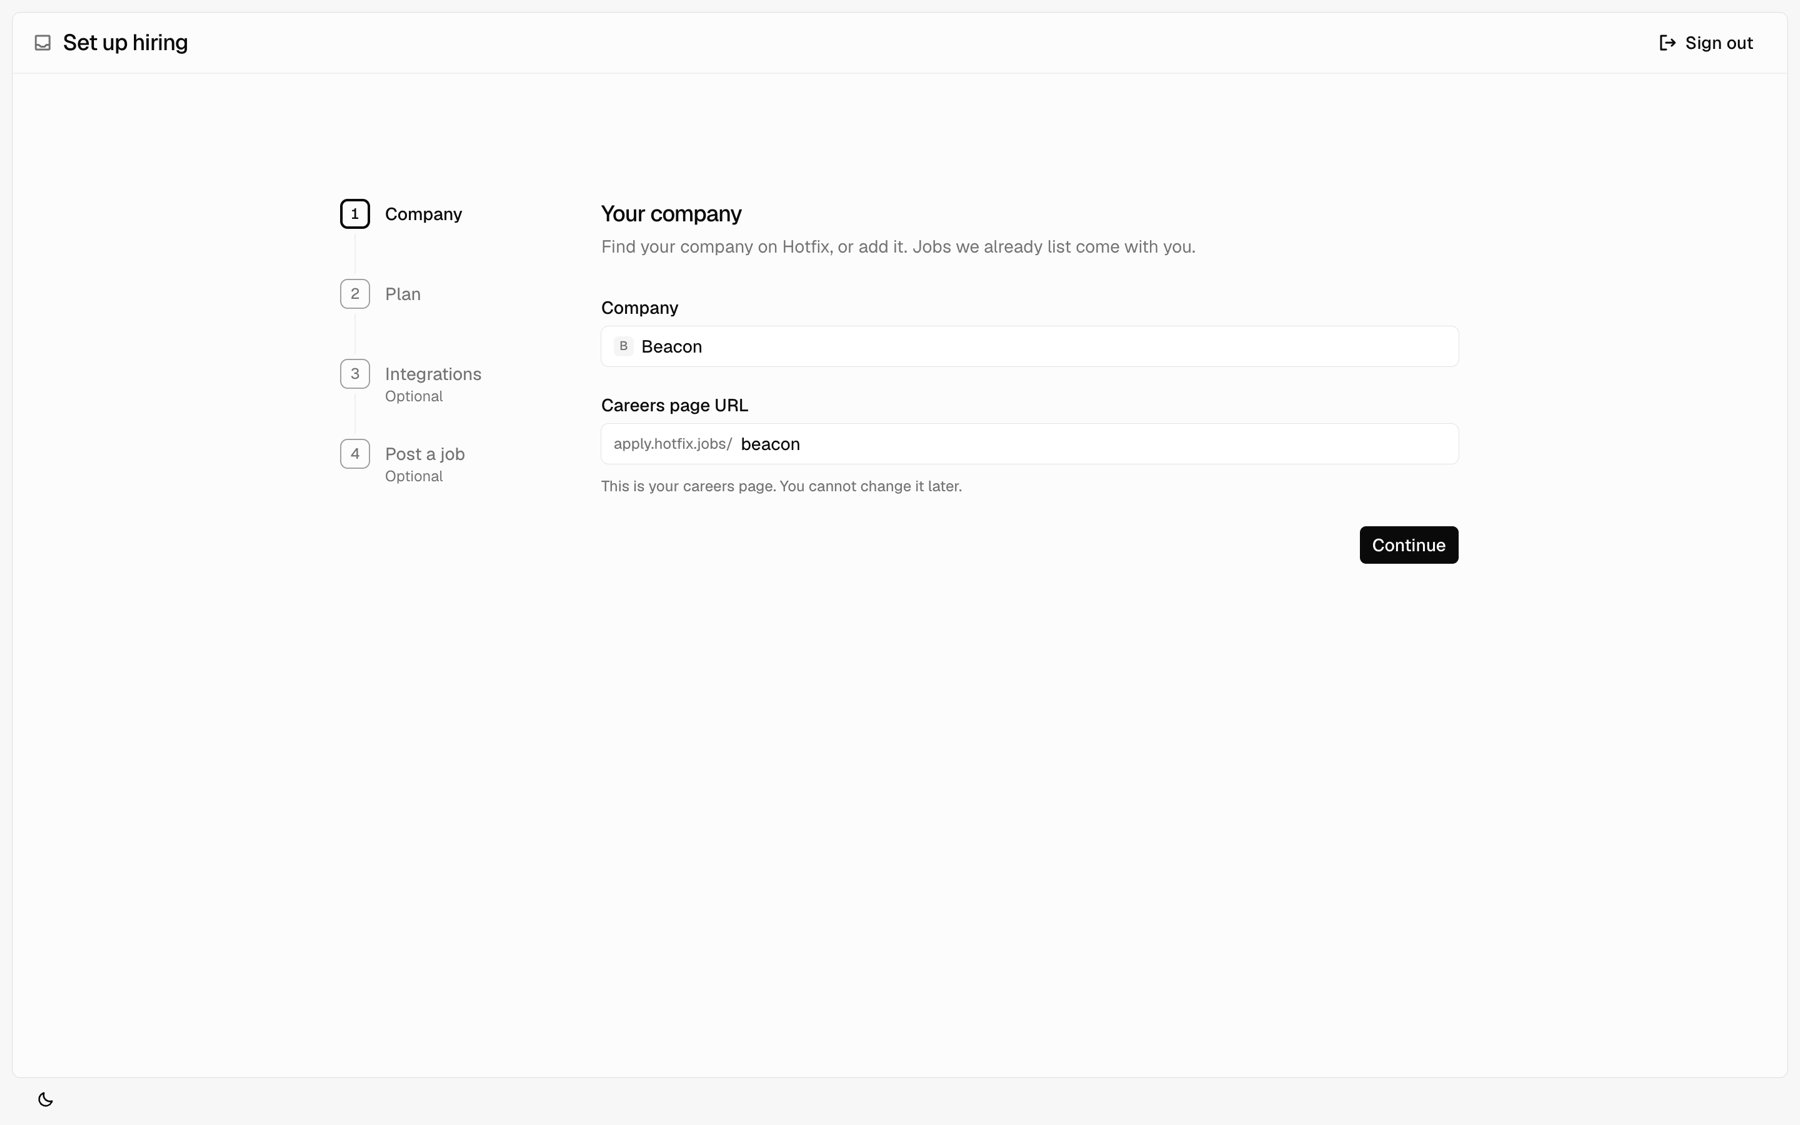 Under **Company**, start typing in **Find your company**. If Hotfix already knows your company, pick it. If not, pick the option to add it.
For a new company, set your **Careers page URL**. It is the address of your careers page, after `apply.hotfix.jobs/`. Use 2 to 48 lowercase letters, numbers, and hyphens. You can't change it yourself later, so choose carefully. Contact us if you need to change it.
For a company Hotfix already knows, the URL is filled in for you. Hotfix checks that you can set up hiring for it. If it can't confirm that, it tells you why. You may see **Switch account**, to sign in with a different account, or **Contact us**.
Click **Continue**.
Pick **Monthly** or **Annual, 10% off**, then pick a plan. Plans differ only in how many jobs you can keep live on your careers page and how many Agent credits you get each month. See [Plans](#plans) below.
Check the box to agree to the Customer Agreement and Data Processing Addendum on behalf of your company. Then click **Pay**, which shows the amount. You pay on Stripe and come back to setup when it's done.
After payment, setup waits a moment for the plan to show up, then moves on.
Connect **Google Workspace** so interview invites land on calendars, and **Zoom** so bookings get a Zoom link. Click a row to connect it. Each row shows **Connected**, **Not connected**, or **Reconnect needed**.
This step is optional. Click **Skip** to do it later under **Settings** > **Integrations**. See [Integrations](/help/integrations).
Write your first job. Add a title, then fill in the details under it, like **Work type**, **Job category**, **Locations**, and **Pay**. Use **Posting** for the job description, **Application** for what applicants fill in, and **Interviews** for what your panel rates in feedback.
**Post job** turns on once the title, description, work type, and job category are set. The job goes live on your careers page right away. Tech jobs also list on Hotfix search.
This step is optional. Click **Skip** to finish setup and post a job later. See [Post a job](/help/post-a-job).
When you finish, the app opens to your **Inbox**. See [Getting around](/help/getting-around).
## If Hotfix already lists your jobs
If Hotfix search already lists jobs from your company, setup adds a step after **Plan** called **Jobs on your careers page**. Check the jobs you want on your careers page, up to your plan's limit. The count under the list shows how many you've picked. Jobs you leave unchecked stay in Hotfix search.
Click **Keep on careers page** to save your picks. If all your jobs fit your plan, **Skip** puts all of them on your careers page.
## Plans
Every plan has the same features. Plans differ by how many jobs you keep live on your careers page.
| Plan | Live jobs | Agent credits each month |
| - | - | - |
| Starter | 10 | 500 |
| Growth | 100 | 1,500 |
| Business | 200 | 4,000 |
A live job is one that's on your careers page. Drafts don't count, and closing a job frees a slot. For prices and plans above 200 jobs, see [hotfix.jobs/pricing](https://hotfix.jobs/pricing).
To change your plan later, an Owner goes to **Settings** > **Billing** and clicks **Change plan**. You can't switch to a plan smaller than the number of jobs on your careers page. Close jobs first. **Billing** also shows how many jobs are on your careers page against your limit.
## When a plan ends
If your plan ends, your careers page goes offline. Your jobs and applications stay in the app, and a notice at the top says **Your plan ended. Your careers page is offline.** The in-app Agent is turned off until you have a plan again.
To bring your careers page back, an Owner clicks **Reactivate plan** in the notice, or goes to **Settings** > **Billing**. Pick a plan, agree to the terms, and click **Reactivate plan** to pay on Stripe. Your company, careers page URL, jobs, and applications are the same as before.
This documentation is built and hosted on [Mintlify](https://mintlify.com), a developer documentation platform.
Under **Company**, start typing in **Find your company**. If Hotfix already knows your company, pick it. If not, pick the option to add it.
For a new company, set your **Careers page URL**. It is the address of your careers page, after `apply.hotfix.jobs/`. Use 2 to 48 lowercase letters, numbers, and hyphens. You can't change it yourself later, so choose carefully. Contact us if you need to change it.
For a company Hotfix already knows, the URL is filled in for you. Hotfix checks that you can set up hiring for it. If it can't confirm that, it tells you why. You may see **Switch account**, to sign in with a different account, or **Contact us**.
Click **Continue**.
Pick **Monthly** or **Annual, 10% off**, then pick a plan. Plans differ only in how many jobs you can keep live on your careers page and how many Agent credits you get each month. See [Plans](#plans) below.
Check the box to agree to the Customer Agreement and Data Processing Addendum on behalf of your company. Then click **Pay**, which shows the amount. You pay on Stripe and come back to setup when it's done.
After payment, setup waits a moment for the plan to show up, then moves on.
Connect **Google Workspace** so interview invites land on calendars, and **Zoom** so bookings get a Zoom link. Click a row to connect it. Each row shows **Connected**, **Not connected**, or **Reconnect needed**.
This step is optional. Click **Skip** to do it later under **Settings** > **Integrations**. See [Integrations](/help/integrations).
Write your first job. Add a title, then fill in the details under it, like **Work type**, **Job category**, **Locations**, and **Pay**. Use **Posting** for the job description, **Application** for what applicants fill in, and **Interviews** for what your panel rates in feedback.
**Post job** turns on once the title, description, work type, and job category are set. The job goes live on your careers page right away. Tech jobs also list on Hotfix search.
This step is optional. Click **Skip** to finish setup and post a job later. See [Post a job](/help/post-a-job).
When you finish, the app opens to your **Inbox**. See [Getting around](/help/getting-around).
## If Hotfix already lists your jobs
If Hotfix search already lists jobs from your company, setup adds a step after **Plan** called **Jobs on your careers page**. Check the jobs you want on your careers page, up to your plan's limit. The count under the list shows how many you've picked. Jobs you leave unchecked stay in Hotfix search.
Click **Keep on careers page** to save your picks. If all your jobs fit your plan, **Skip** puts all of them on your careers page.
## Plans
Every plan has the same features. Plans differ by how many jobs you keep live on your careers page.
| Plan | Live jobs | Agent credits each month |
| - | - | - |
| Starter | 10 | 500 |
| Growth | 100 | 1,500 |
| Business | 200 | 4,000 |
A live job is one that's on your careers page. Drafts don't count, and closing a job frees a slot. For prices and plans above 200 jobs, see [hotfix.jobs/pricing](https://hotfix.jobs/pricing).
To change your plan later, an Owner goes to **Settings** > **Billing** and clicks **Change plan**. You can't switch to a plan smaller than the number of jobs on your careers page. Close jobs first. **Billing** also shows how many jobs are on your careers page against your limit.
## When a plan ends
If your plan ends, your careers page goes offline. Your jobs and applications stay in the app, and a notice at the top says **Your plan ended. Your careers page is offline.** The in-app Agent is turned off until you have a plan again.
To bring your careers page back, an Owner clicks **Reactivate plan** in the notice, or goes to **Settings** > **Billing**. Pick a plan, agree to the terms, and click **Reactivate plan** to pay on Stripe. Your company, careers page URL, jobs, and applications are the same as before.
This documentation is built and hosted on [Mintlify](https://mintlify.com), a developer documentation platform.